
Preparations For Jump-Start
The battery in your vehicle is located between the left front headlight assembly and the left front wheel splash shield. To allow jump-starting there are remote battery posts located on the left side of the engine compartment.
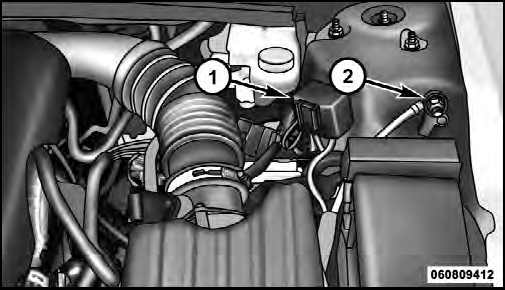
Remote Battery Posts
1 — Remote Positive (+) Post (covered with protective cap)
2 — Remote Negative (-) Post
WARNING!
• Take care to avoid the radiator cooling fan whenever
the hood is raised. It can start anytime the
ignition switch is on. You can be injured by
moving fan blades.
• Remove any metal jewelry such as watch bands or bracelets that might make an inadvertent electrical contact. You could be seriously injured.
• Batteries contain sulfuric acid that can burn your skin or eyes and generate hydrogen gas which is flammable and explosive. Keep open flames or sparks away from the battery.
1. Set the parking brake, shift the automatic transmission into PARK and turn the ignition to LOCK.
2. Turn off the heater, radio, and all unnecessary electrical accessories.
3. Remove the protective cover over the remote positive (+) battery post. To remove the cover, press the locking tab and pull upward on the cover.
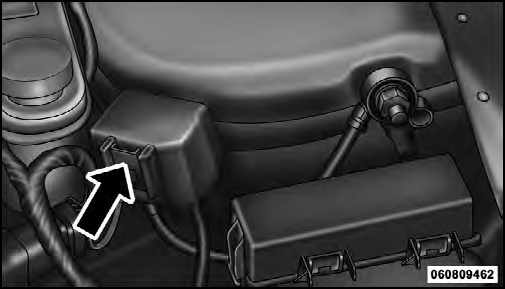
Locking Tab
4. If using another vehicle to jump-start the battery, park the vehicle within the jumper cables reach, set the parking brake and make sure the ignition is OFF.
WARNING!
Do not allow vehicles to touch each other as this
could establish a ground connection and personal
injury could result.
See also:
Turn Signals
Move the multifunction lever up or down and the arrows
on each side of the instrument cluster flash to show
proper operation of the front and rear turn signal lights.
NOTE:
• If either light r ...
Power Seats
On models equipped with power seats, the switch is
located on the outboard side of the seat near the floor.
Use this switch to move the driver’s seat up or down,
forward or rearward or to recli ...
To Vary The Speed Setting
When the Electronic Speed Control is set, you can increase
speed by pushing the RES (+) button. If the button
is continually pressed, the set speed will continue to
increase until the button is ...