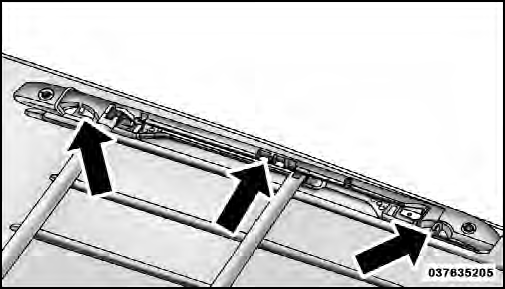
Stowing the Crossbars
Reverse the procedure to stow the crossbars, again, taking care to keep hand clear of pivoting joint. Crossbars are identical and can be stowed in either rail nest. Once the crossbars are stowed, tighten the thumb screws completely.
NOTE:
Load should always be secured to crossbars
first, with rail tie down loops used as additional securing
points if needed. Tie loops are intended as supplementary
tie down points only. Do not use ratcheting mechanisms
with the tie loops.

Rail Tie Loops
CAUTION!
• Check deployed crossbars frequently and retighten
thumb screws as necessary.
• To avoid damage to the roof rack and vehicle, do
not exceed the maximum roof rack load capacity of
150 lbs (68 kg). Always distribute heavy loads as
evenly as possible and secure the load appropriately.
• To prevent damage to the roof of your vehicle, DO
NOT carry any loads on the roof rack without the
crossbars deployed.
• The load should be secured and placed on top of
the crossbars, not directly on the roof. If it is
necessary to place the load on the roof, place a
blanket or other protective layer between the load
and the roof surface.
• Long loads which extend over the windshield,
such as wood panels or surfboards, or loads with
large frontal area should be secured to both the
front and rear of the vehicle.
• Travel at reduced speeds and turn corners carefully
when carrying large or heavy loads on the
roof rack. Wind forces, due to natural causes or
nearby truck traffic, can add sudden upward lift to
a load. This is especially true on large flat loads
and may result in damage to the cargo or your
vehicle.
WARNING!
Cargo must be securely tied before driving your
vehicle. Improperly secured loads can fly off the
vehicle, particularly at high speeds, resulting in personal
injury or property damage. Follow the Roof
Rack Cautions when carrying cargo on your roof
rack.
See also:
Cooling System – Drain, Flush, And Refill
If the engine coolant (antifreeze) is dirty or contains a
considerable amount of sediment, clean and flush with a
reliable cooling system cleaner. Follow with a thorough
rinsing to remove all de ...
Overdrive Operation
The automatic transmission includes an electronically
controlled Overdrive (sixth gear). The transmission will
automatically shift into the Overdrive gear if the following
conditions are present ...
SET/RND Button (Random Play Button)
Press this button while the CD is playing to activate
Random Play. This feature plays the selections on the
compact disc in random order to provide an interesting
change of pace.
Press the righ ...
